⛄️ Last Orders Friday Dec 20th at 12noon. We will be closed Monday Dec 23rd - Re-open Thursday Jan 2nd 2025 🎅

⛄️ Last Orders Friday Dec 20th at 12noon. We will be closed Monday Dec 23rd - Re-open Thursday Jan 2nd 2025 🎅

 FREE DELIVERY on everything


 FREE DELIVERY on everything

undefined

FREE UK Next Day Delivery

undefined

FREE Artwork File Check

undefined

White Label Packaging

reviews-reduced.png


How to produce a school prospectus that gets results
23 Oct 2018
 

How to produce a school prospectus that gets results


How to produce a school prospectus that gets results

23 Oct 2018
How-to-design-a-school-prospectus

These days most schools have a website where due to changes to Ofsted regulations, they must house all of their important information (full guidelines can be found here).

Does this mean that printed prospectuses and school brochures are any less important in today’s world? Certainly not.

A well presented and informative printed prospectus offers a really great opportunity to convince prospective parents and pupils to choose your school over your competitors.

They can offer a greater window in to life at your school, and can be handed out to prospective pupils at open days or perhaps where access to the internet and your website is not easily available.

Not to mention that more and more people are turning away from their screens and back to print when they really need to digest important information.

If you have been tasked with creating your school prospectus the following 3 steps will help get you on your way to creating a really powerful document that will get you the results you want!

Planning your prospectus

It is a good idea to have your prospectuses published and available at least 6 weeks before the final dates for applications – so you will need to start your planning well in advance.

What to include

As of 2012 it is now mandatory for all schools to display their key information on a website. This change means that there is now much more space within your brochures to include exciting visuals or desirable information to really sell yourself to prospective parents and pupils – keeping all of the boring stuff online.

Start by mapping out and writing the content that will be included in the prospectus. The main objective of your brochure is to capture your school’s spirit – so arrange meetings with key members of your school’s committee to agree on the tone of your content, what key points to include or to gather any quotes and insights that will help support you in creating a true reflection of what your school represents.

Put some thought into who will be reading your prospectus and why – usually parents and pupils who have lots of questions about your school such as “What does the campus look like?” or “What is the admissions process?”. Writing a list of common questions which you must answer within your content will give you another great starting point.

You could even speak with your current pool of parents and pupils to find out what key questions they needed answering during the prospecting process or what information they would have found helpful and interesting.

Here are some other key points to include in your prospectus:

  • Name and type of school
  • Contact details
  • Information on term dates and admissions
  • Your school values and ethos
  • Statement from the Headteacher
  • Supporting quotes from pupils, parents and faculty
  • Curriculum information including teaching methods

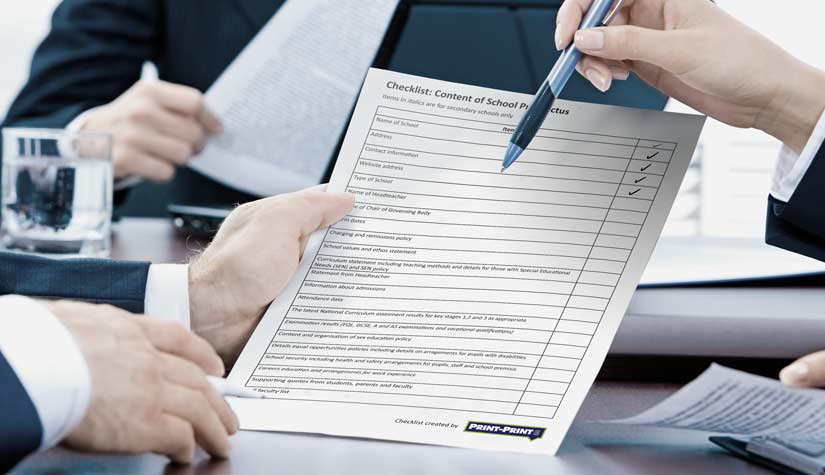
We have created a more comprehensive checklist for prospectus content to help you with your planning which you can download for free below.

Print-Print-School-Prospectus-Checklist

Download the checklist for free here>

Structure

Once you have your content written up (and checked for grammar and spelling!) you will need to look at the structuring of your prospectus.

You will need to think about the running order of the pages, as well as the page by page structure. Each page will need to include a similar amount of information broken down in to similar chunks of content for consistency throughout.

For example, will each one of your pages include a heading, sub headings, chunks of text, quotes or testimonials and statistics?

Having a clear vision of how much content you are going to be placing on each page and how they will be broken down in to bite-sized chunks will help you when it comes to the design stage (we will get to that later).

The running order of your prospectus is also extremely important. The flow of the document needs to make sense. Think about the reading of your prospectus as a miniature journey through your school. What information will people want or need to know, before they move on to the next section?

There is no exact science to the order you should be presenting your content, but here’s an example of what could work:

  • Cover and inside cover page – School logo, name, location and contact details including website
  • Page 1 – Contents
  • Page 2 – Statement from the Headteacher
  • Page 3 – School’s mission statement including supporting quotes
  • Page 4 – Statement of teaching methods
  • Page 5 – reasons to choose the school
  • Page 6 – Supporting quotes from students, teachers and parents
  • Page 7 and 8 – Curriculum information including statistics and supporting quotes
  • Page 9 – School security
  • Page 10 – Term dates, admissions and charging policies
  • Page 11 Closing statements and statistics
  • Back cover – School map and other useful information

TIP: Remember that brochure pages need to be printed in multiples of 4 so when you are planning the structure of your brochure ensure that your pages add up! If you are struggling to keep your page count to multiples of 4 you could always add in a full page of images to break up the content and bump up your page count.

Photography

The imagery you use to represent your school within your prospectus is equally as important as the words you use. This is where your prospectus will really come to life – so it is incredibly important that you do not scrimp on this stage!

Now that you have your content planned out you should have a good idea of what types of photographs you need to really bring your school’s spirit to the pages of your prospectus.

children-in-classroom

Start by making a check list of the types of images you need to sit along side your written content.

For example, if you school is prestigious for it’s sporting results, make sure you have lots of imagery of your pupils and staff enjoying themselves in your gymnasium or playing fields. If your science department is state of the art, arrange some time to capture the amazement on your pupils faces when they are experimenting in your laboratories.

Hire a professional photographer and plan a day to capture the photographs your need. Don’t forget to let the parents of your current pupils know this is taking place and ask for their consent for their children’s image to be used within your prospectus!

Tip: Arrange your photography day in September. You will have lots of fresh faced and eager pupils in brand new uniforms – this will easily make the impact of your photographs much higher!

girls-playing-sport

If you are working on a budget you may need to take the images yourself. We would recommend steering clear of using a mobile phone for this – although the quality of the photographs being produced by some mobile phones these days is incredible – they are not going to give you the quality required for print.

For tips on how to take better marketing photographs on a budget check out this blog

Designing your prospectus

Now that you have all of your written content and beautiful imagery you are ready to pull it all together and begin to see your new school prospectus take shape.

What size to choose

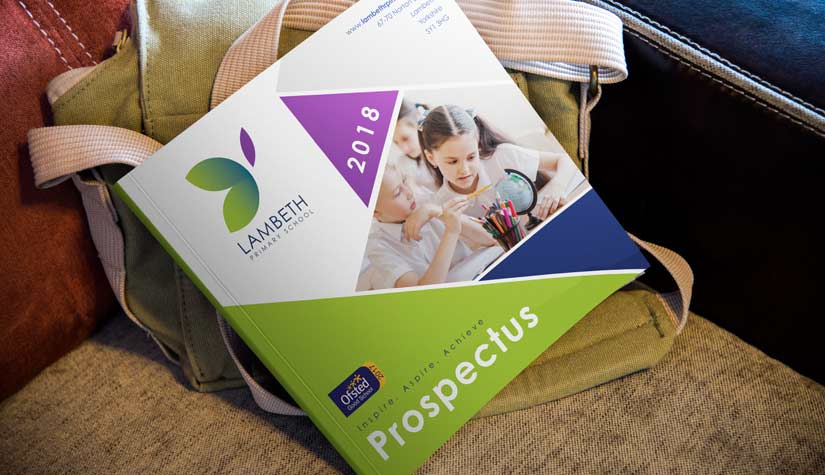
The first thing you will need to decide on is what size your prospectus is going to be. Typically, school prospectuses are A4 portrait brochures. But you don’t have to stick to the norm!

You could opt for a 210 x 210mm square brochure to stand out from your competitors, or even go to an A5 size so it is easier for prospective parents to carry in their bags!

lameth-prospectus

There are lots of options for you to choose from when it comes to the size and shape of your brochure – just make sure you think about the amount of content you have, the format of the images you will be using and where you will be displaying these brochures to ensure you pick a format that will work!

Colour and fonts

The importance of choosing the right font and colour palette when designing a brochure is often overlooked. Using an illegible font or picking a dull colour scheme could really cause you some problems, especially when it comes to producing a printed brochure – it should be easy to read and really ‘pop’!

Have a look at your current website and other marketing materials. Ideally your school prospectus should match the rest of your current branding and colour schemes.

You should also take in to consideration the size that your brochure will be printed and make sure you choose simple fonts that will be legible when used in headings, subheading and main body text. Avoid picking fonts that are too busy, or become hard to read when scaled down.

TIP: Sans-serif fonts are usually easier to read when printed, especially at a smaller size. Some of the most popular sans-serif fonts are Century Gothic, Helvetica or Verdana.

Getting it print ready

Speaking of the importance of colour – you will also need to make sure you select the correct colour profile in your chosen design software before you start creating the brochure.

Most computer design programs such as Adobe Photoshop will default to a RBG profile. This is great for designing for digital mediums such as a website, but as your prospectuses are going to be printed you will need to select the CMYK profile.

Professional printers, such as ourselves, use the CMYK colour process for printing. The way the colours are created using this process is completely different to how they are created during the RGB process, so designing a document for print using an RGB colour profile could result in some surprise colour shifts.

Another important factor to take into account when designing for print is ‘bleed’.

Bleed is a printing term that is used to describe a document that has images or elements touching the edge of a page. If no bleed is added, the end result could have small white slithers along the edges of the images or colour elements, instead of them ending flush with the edge of the page.

When designing, make sure any images or colour elements extend for 3mm beyond the page (or trim) edge. Most computer design programs will allow you to save your document with the bleed area added.

For example, if you are creating an A4 document, the page dimensions should be 210mm x 297mm for the trim size and 216mm x 303mm with an added bleed area around all 4 edges.

You can download our free artwork guide templates from here to help lay out your brochure pages with the correct dimensions and bleed areas.

The quality and size of your images is also an important factor when designing for print.

Print resolution is 300dpi, which means all of the images used in your brochure should also be this resolution. If the images are less than this, they run the risk of printing quite blurred or pixelated which is not going to look good when prospective parents are flicking through your brochure.

Images saved from the internet are usually 72dpi and are not suitable for print so avoid doing this at all costs. Hiring a professional photographer with a good digital SLR camera will ensure that your images are all high quality and will be suitable for your prospectus.

You can find more helpful brochure design tips here

Printing your prospectus

Now that you have your prospectus digitally produced you are ready to send that baby to print! There are just a few more things you will need to consider before you are ready to give the go-ahead.

Choosing the finish

The printed finish and materials you choose for your prospectus will be the edge you can take over your competitors.

Generally it’s a good idea to opt for a slightly thicker cover with lamination. This will ensure your brochure stays protected when it is carried in a backpack and will help avoid bent corners or damage from spills.

However, there are lots of different paper materials and printed finishes you could choose from.

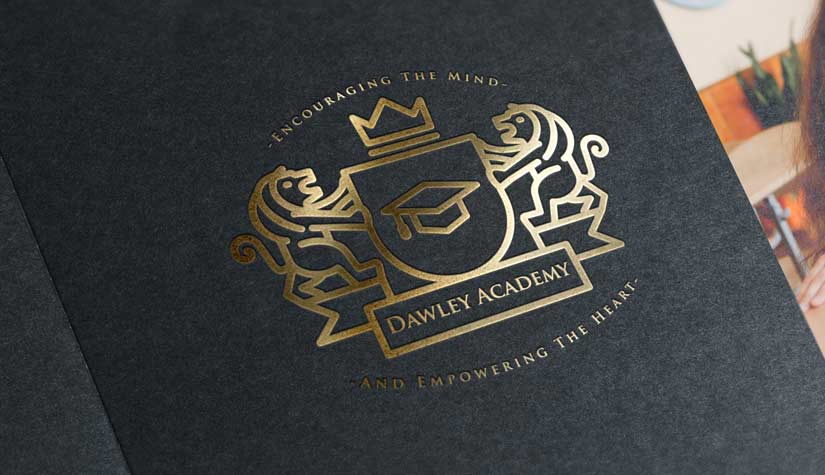
Why not opt for a spot UV on your school logo, or even gold foiling on the cover to really make a statement?

Dawley-academy-gold-foil-logo

Most printing companies will have the option of requesting a sample pack so you can see the different types of papers and finishes in the flesh before making your decision.

Here at Print-Print, we offer a totally free sample pack request service which you can use by filling in the form here.

What binding should I pick?

The binding of your brochure, or the way the pages are held together is another printing option that you will need to consider.

If you are working on a budget, or have a prospectus with a relatively low number of pages, opting for a stapled brochure binding will be ideal for you.

Sometimes known as ‘saddle stitch’, this type of binding sees 2 metal staples through the spine of the document to hold all of the pages together. This is the most common form of brochure binding.

If you are looking for something a little more refined or premium, opt for perfect binding.

This type of binding is most common with magazines. As the pages are glued together at the spine with a strong glue, it gives space for information such as your school’s name or the year the prospectuses was issued to be printed along the spine too.

TIP: If you are choosing a perfect binding, you will need to supply your cover (front and back) artwork separate to the inner pages. This is because the front and back cover will be printed together, with around 3-5mm in between for the spine.

Complimentary items

Your school prospectus is going to be the biggest asset in your marketing tool box (along with your website) to entice prospective students and parents to sign up for admissions to your school.

However, you could be using lots of other printed products to enhance and compliment your marketing activities. Such as:

For example, it is appreciated that printing a new prospectus every year could become costly. So, you could have your main prospectus carry information that very rarely changes. Then in addition to this, you could print statistics and other information that may change year up-on year on to separate sheets, which can then be slipped inside the prospectus. This will keep your brochures fresh and up to date without the need for repeated printing costs.

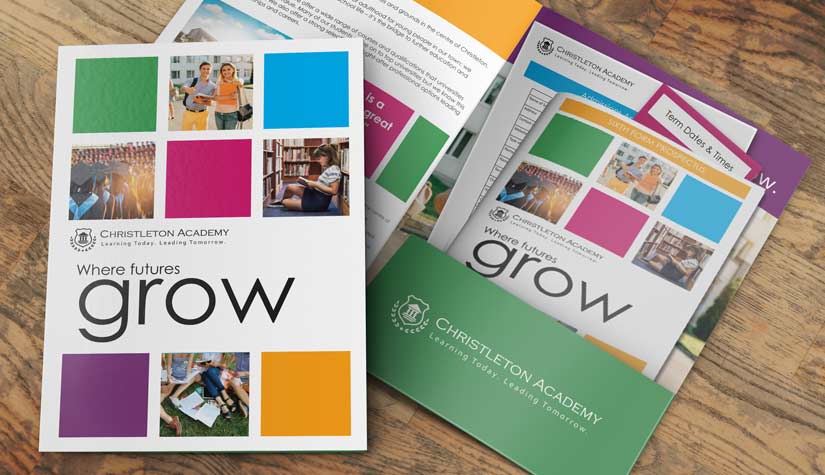
printed-presentation-folder-for-schools

Alternatively, you could house your prospectus, yearly information sheets and any other printed marketing materials you may have such as news letters or admissions forms, neatly inside a professionally printed presentation folder – for the ultimate school application pack.

To sum up…

Producing a stunning school prospectus can sound like a daunting task at first, but with a clear structure, a little design work and a partnership with a great printer, it is easy to produce a prospectus that you will be really proud of.

Just remember to:

  • Create a clear plan and structure of what information you are going to include
  • Structure your content in a way that flows well and is easy to read
  • Hire a professional photographer to capture your school at it’s best
  • Design your prospectus at an appropriate size, using the CMYK colour profile
  • Choose simple clean fonts and a recognisable colour scheme
  • Opt for a laminated cover when printing for protection against knocks or spills – keeping your prospectus looking great for longer.


When you’re ready to see your school prospectus go into print check out our brochure printing options or if you need a little extra help getting the design right give us a call on: 01952 850730

Images coutesy of freepik.com and pexels.com


Get a feel for what we do!

Our FREE sample packs are full of great print ideas. They’ll give you a taste of what to expect when ordering your design and printing from us.

Request free sample pack